The Hackspace recently took delivery of a Raspberry Pi NoIR Camera Module from Farnell – full details are on their website. It is an add-on camera module for the Raspberry Pi which has no infrared filter, making it perfect for taking infrared photographs or photographing objects in low light (twilight) conditions. The camera plugs directly into the Pi by way of a 15 pin Ribbon Cable, to the dedicated 15 pin MIPI Camera Serial Interface (CSI). The standard ribbon cable supplied is going to be too short for our 3D printer needs, but longer ribbon cables can be purchased. The cable can easily be replaced by uncoupling at the camera end.

- General Specification
- Omnivision 5647 sensor in a fixed-focus module without IR filter
- 5 megapixel
- 2592×1944 stills
- 1080p at 30 frames per second
- 720p at 60 frames per second
- 640x480p at 60/90 frames per second
- CSi interface with 150mm ribbon cable
- Weighs 2.4g (3.4g with ribbon cable)
In this post I’ll cover what we did to get the camera module working and ready for use. There will be a follow up post which will show how we are actually using it and how the camera and Pi is fitted to the printer.
A Bit of Background
The Hackspace already has a Raspberry Pi running as a 3D print server allowing the controlling of our Prusa Mendel through the two options of either Octoprint or Repetier Server. The Pi distribution was provided by myself and is Raspbian with Octoprint and Repetier Server loaded afterwards. What we need to do is add support for the RaspiCam and web video streaming. Initially to take time-lapse videos of 3D printing then moving onto other projects afterwards.
Repetier Server or Octoprint?
The short answer for the Hackspace is both, and we use whatever our own personal preference is. Repetier Server is not to be confused with Repetier Host, which is by the same developer. Repetier Host is a full work flow solution for 3D printing to create, visualise and edit printer paths, as well as full printer control. All of this software is completely free.
Octoprint has built in camera support for time-lapse video or stills while printing, or even live streaming via it’s web interface. It also allows graphical visualisation of the printer extrusion paths live as they are being printed. Repetier Server does not have support for either of these although live streaming can still be accessed on port 8080 via the mjpg-streamer web interface, which gets installed as part of the set-up for the video side of things (more on that later). Repetier server has an annoying bug where after you have ran a print job, the manual extrude feature either does not work, or wants to extrude forever, resulting in a switch off and switch on solution. However, Repetier server does seem faster when uploading gcode, or when choosing to print a previously uploaded file.
For the purposes of this article we will be focusing on using OctoPrint, because as mentioned earlier, it has built in camera support.
The Beginning
To create a 3D print server on a Pi from scratch, the easiest route to follow is to download the OctoPi distribution and follow their instructions, which have everything included to get the Pi working with OctoPrint and the RaspiCam. You can then add on Repetier Server to this afterwards should you wish. Installing OctoPi would make this article end now and everything would be so straight forward.
Updating the Raspberry Pi
It’s been some time since the Pi was updated so we thought it was best to go through this first.
We updated the Raspbian install on our Raspberry Pi by running :
apt-get update && apt-get upgrade
You may need to be root, in which case :
sudo apt-get update && sudo apt-get upgrade
This took some hours.
Enabling the camera
Open the raspi-config tool from the Terminal:
sudo raspi-config
Select camera, then select Enable, and when prompted to reboot select Yes.
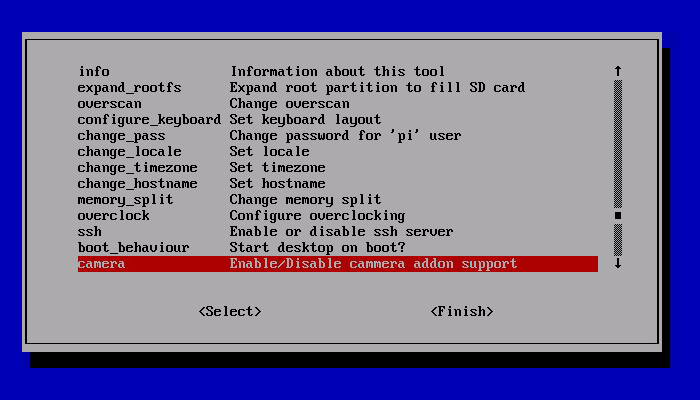
Enabling the camera using raspi-config did two things. It told your Pi that there is a camera attached and it added three command line utilities.
raspistill
raspivid
raspiyuv
With the camera module connected and enabled, enter the following command in the Terminal to take a picture:
raspistill -o cam.jpg
For more on command line usage, see : http://www.raspberrypi.org/documentation/usage/camera/raspicam/README.md
Installing Octoprint
If you do not have Octoprint installed and don’t fancy installing the OctoPi distribution, then maybe you would prefer to add Octoprint onto your existing Pi OS? For this I would only be repeating (and not very well) what has already been written over on the OctoPrint Github Repository, so check it out.
Adding RaspPiCam Support to Octoprint
The repository we need to download, unpack and compile is mjpg-streamer-experimentalby Liam Jackson. This has the RaspiCam plugin
For the compile side, we need to ensure the command cmake and a dev version of libjpeg is pre-installed:
sudo apt-get install libjpeg62-dev
sudo apt-get install cmake
When prompted select Y to install.
cd ~
wget https://github.com/jacksonliam/mjpg-streamer/archive/master.zip
unzip master.zip
rm master.zip
cd mjpg-streamer-master/mjpg-streamer-experimental
make clean all
You can run directly from the mjpg-streamer-experimental folder with:
export LD_LIBRARY_PATH=.
./mjpg_streamer -o "output_http.so -w ./www" -i "input_raspicam.so"
You can also specify options, like in raspivid above
export LD_LIBRARY_PATH=.
./mjpg_streamer -o "output_http.so -w ./www" -i "input_raspicam.so -x 1280 -y 720 -fps 15 -ex night"
If you have followed the install guide for OctoPrint correctly, then you will need to make the following changes to your startup script to now look at this new mjpg-streamer-experimental folder:
Edit the /home/pi/bin/octoprint start up script with the following:
#!/bin/sh
OCTOPRINT_HOME=/home/pi/OctoPrint
MJPEG_STREAMER_HOME=/home/pi/mjpg-streamer-master/mjpg-streamer-experimental
export LD_LIBRARY_PATH=$MJPEG_STREAMER_HOME

# start mjpeg streamer
$MJPEG_STREAMER_HOME/mjpg_streamer -i "$MJPEG_STREAMER_HOME/input_raspicam.so -x 1280 -y 720 -fps 15 -ex night" -o "$MJPEG_STREAMER_HOME/output_http.so -w $MJPEG_STREAMER_HOME/www" &

# start the webui
$OCTOPRINT_HOME/run --daemon start
Hopefully that’s it, after a reboot, you should find that OctoPrint is running on the http://<your Raspi's IP>:<port number> you have assigned and the webcam feed from the RaspiCam is visible in the Control tab
You can see in the following photo that the infrared from a remote control can be picked up, due to this model of RaspiCam having no infrared filter.

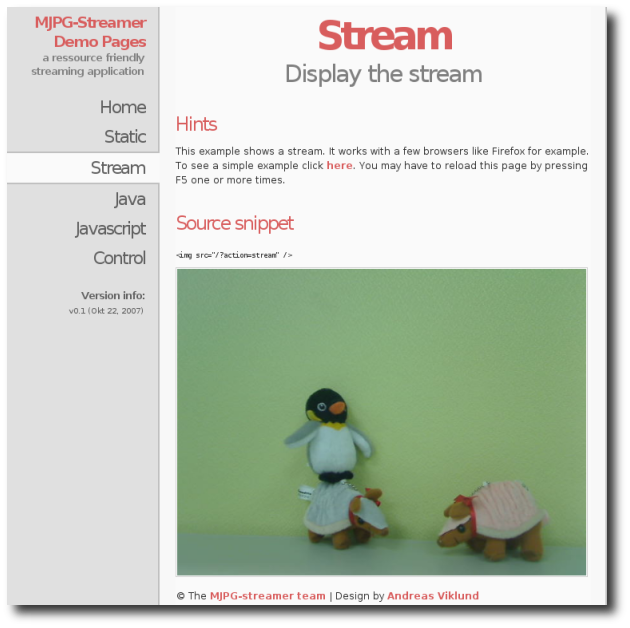
NOTE : You can still access the webcam stream without OctoPrint installed, in case you want to use Repetier Server instead. Just type http://<your Raspi's IP>:8080 in your favourite browser.
Next Steps
We now need to design an enclosure for the Pi and PiFace, buy a longer camera ribbon connection, then find a suitable mounting position on the Prusa Mendel for it’s final resting place.

Is the process described here same for raspicam V2?
What version of Octopi was used? And what version of Raspian OS?
Thanks!
That was 5 years ago.. we’ve since upgraded things – and I don’t know what happened to the camera setup, its not in use now.
For Octopi/print I would suggest using the latest release / stable version, not a 5 year old one. Cameras supported by current Octoprint (and the various setup docs) are on their wiki – https://github.com/foosel/OctoPrint/wiki/Webcams-known-to-work