A while back I was watching either a YouTube video or reading a blog post about soldering wires onto PCBs, possibly a quadcopter power distribution board. After soldering, the guy got out something called liquid electrical tape and gobbed some over the solder joints to reinforce them. Brilliant I thought! Why have I never head of this stuff before? I usually use the hot glue gun for things like that, but somehow this looked better and neater.
So I promptly got on Google and looked into this stuff. There were a few different manufacturers and it wasn’t that cheap, so I nearly didn’t buy any because I didn’t have a specific use for it at the time. But in the end I thought what the heck and ordered some from Amazon.

It arrived, I opened it, looked at the bottle of black gooey tar-like liquid, went “mmm, nice”, didn’t really have a use for it and so it sat on my desk unused.
Until now!
Enter the Round Raspberry Pi Camera Extension Cable.
I’ve been meaning to fit a camera to my 3D printer’s Raspberry Pi and hook it into OctoPrint since I got the printer, and I finally got round to getting a camera. The cable that comes with it however, is flat and woefully short. Not great for routing around to get the camera into the ideal location. I’d looked for round cables in the past with no joy, but was pleased to find that someone was now selling them on eBay.
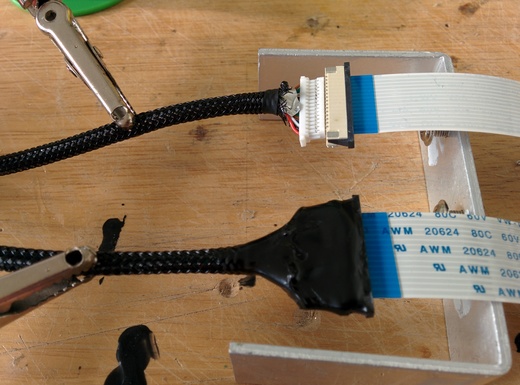
As it arrives it’s a bit “diy” to say the least, but that’s okay. What you get is a cable with a plug on each end and a socket that looks like it should be mounted onto a PCB. Plugging the plug part into the back of the PCB socket and connecting up the camera proved that it worked fine, however the connection wasn’t at all secure and any movement of the camera or cable caused it to stop working, requiring a reboot of the Pi to get it going again.
That wasn’t going to be very good, since I was planning on mounting the camera on my printbed which moves back and forth. I thought about heat shrinking the connection to reinforce it, but realised it was a perfect opportunity to try out the liquid tape that had been sitting on my desk for quite a few weeks now.
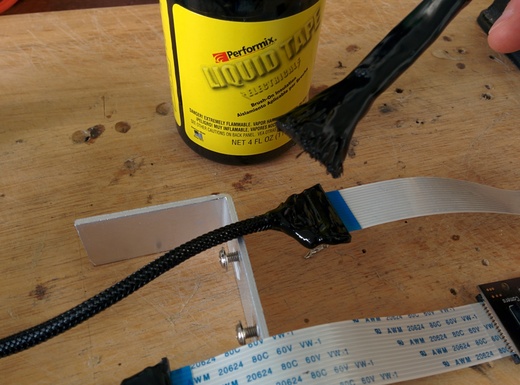
Knowing that the cable was working, I supported it on my desk with some helping hands and a random heat sink that was lying around, then started to apply the black goo from the bottle using the brush attached to the inside of the lid.
I applied plenty so as to cover the whole of the PCB socket; all the time hoping this worked, because it wasn’t going to come apart again without making some serious mess and probably ruining the cable.
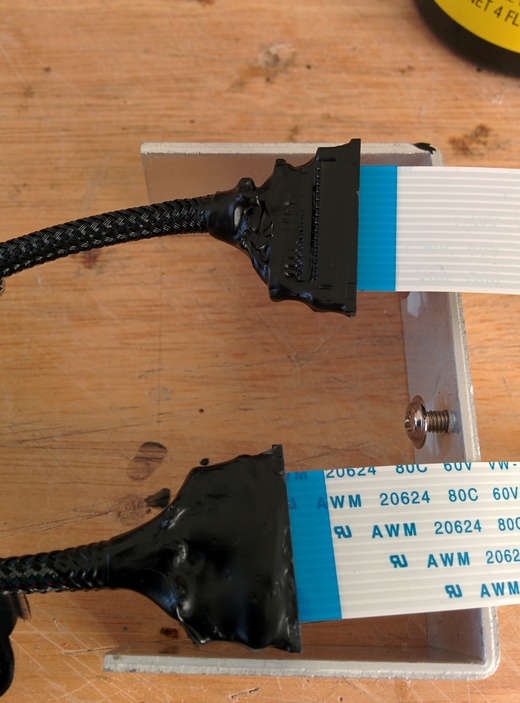
It took a couple of coats to get a good covering (that’s what it recommends on the bottle). The goo seemed to shrink slightly as it dried and formed a nice tight rubbery seal around the connection.

The finished seal looks pretty tidy, probably more tidy than if I’d used heat shrink. The cable still works and the camera can be moved around without loosing its connection to the Raspberry Pi. Success!
So, if you enjoy messing around with black goo, enjoy the smell of strong solvent and have some electrical connections that need sealing or reinforcing, I can highly recommend using some liquid electrical tape.