The saying, “You cannot push on a rope” remains as apt as ever when it comes to 3D printing with flexible filaments. Most printers will have some form of success straight out of the box with flexible filaments, but don’t be greedy to begin with, turn the printing speed right down. Within this article I will try to explain as best as I can the problems, pitfalls to avoid and how to achieve success with pushing on a rope to achieve good print quality at acceptable speeds, in this case substituting the rope for flexible and elastic filaments for 3D printing such as Filaflex.
What is Flexible Filament?
A flexible filament is generally a Polyurethane or Co-Polyester (not exclusively) Thermoplastic Elastomer (TPE) with a complex mix of additives/colourants to aid the 3D printing process. With good elastic properties and high co-efficient of friction means 3D printed designs in this filament expand the design possibilities. Effectively it is a soft stretchy grippy material.
First Print
I know the feeling, you have just took delivery of your first reel of flexible filament, you load it into the printer, if you get as far as heating up the hot-end and actually getting to press the print button, then you have done well. My first time, the filament didn’t even feed down into the hot-end successfully but came out of the side of the extruder from the hobbed shaft area making the usual spaghetti mess. I thought there would be a problem, because the first item on my hit list was a previously noted gap between the hobbed shaft and the entry into the hot end is a whopping 10mm.
Problem #1 – Unconstrained Filament
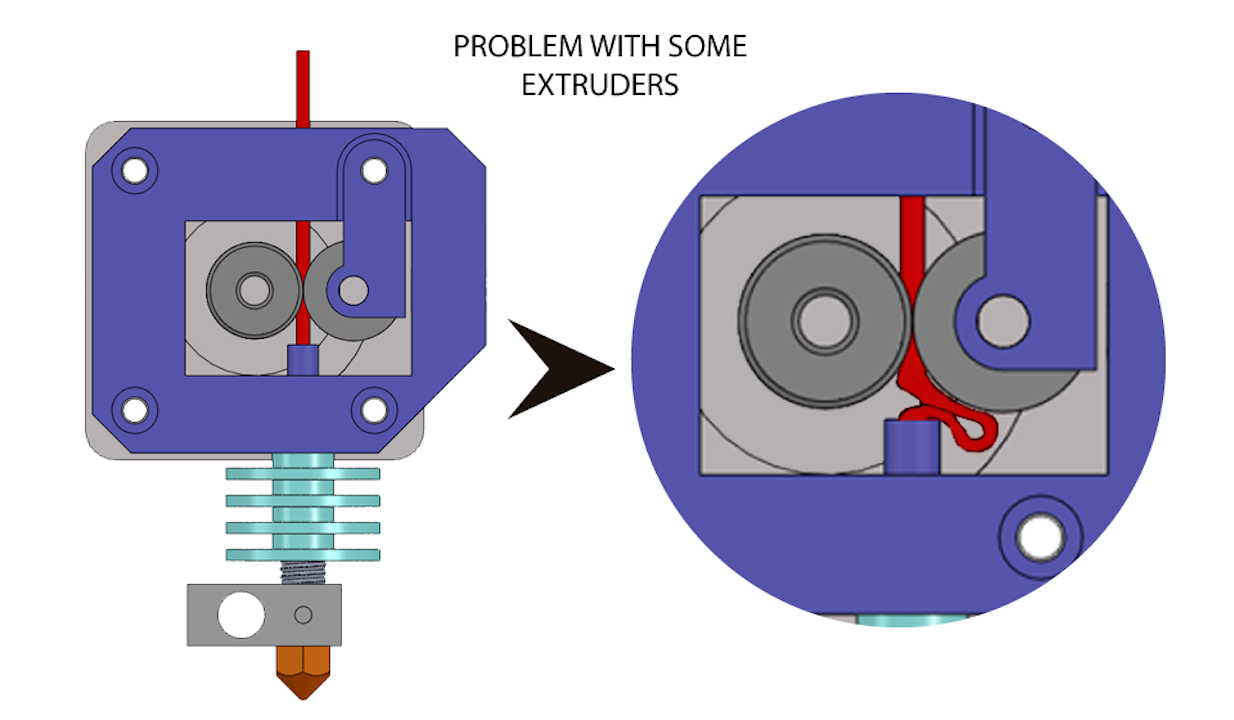
If a gap exists between the extruder drive gear (or hobbed shaft) and the entry hole of the hot end, then the filament can buckle and once the buckling process has started then it’s too late and the filament will find a way out of the extruder sideways. If left unattended for a significant time, a flexible birds nest will have entombed your printer probably jamming a few axes motors in the process, which is not a wise move.
Even a small gap can have issues :
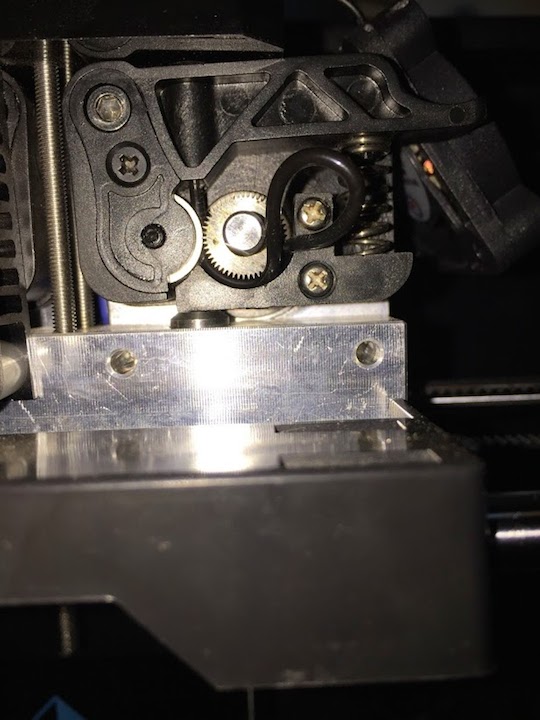
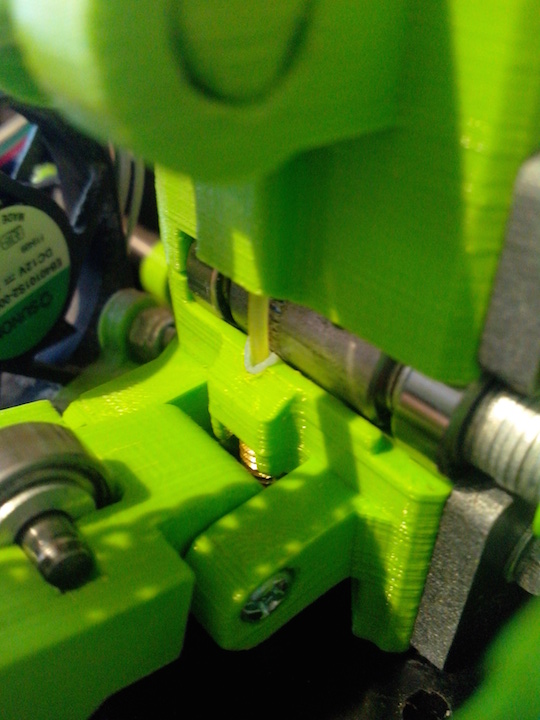
Solution #1
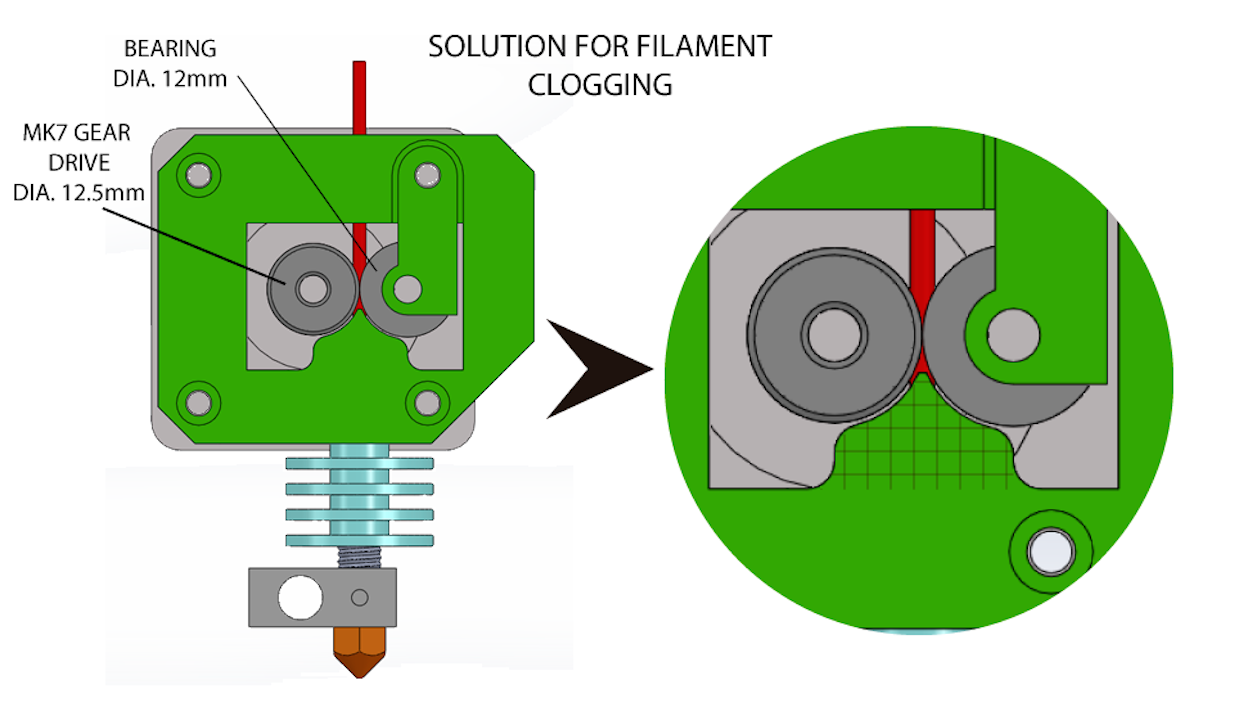
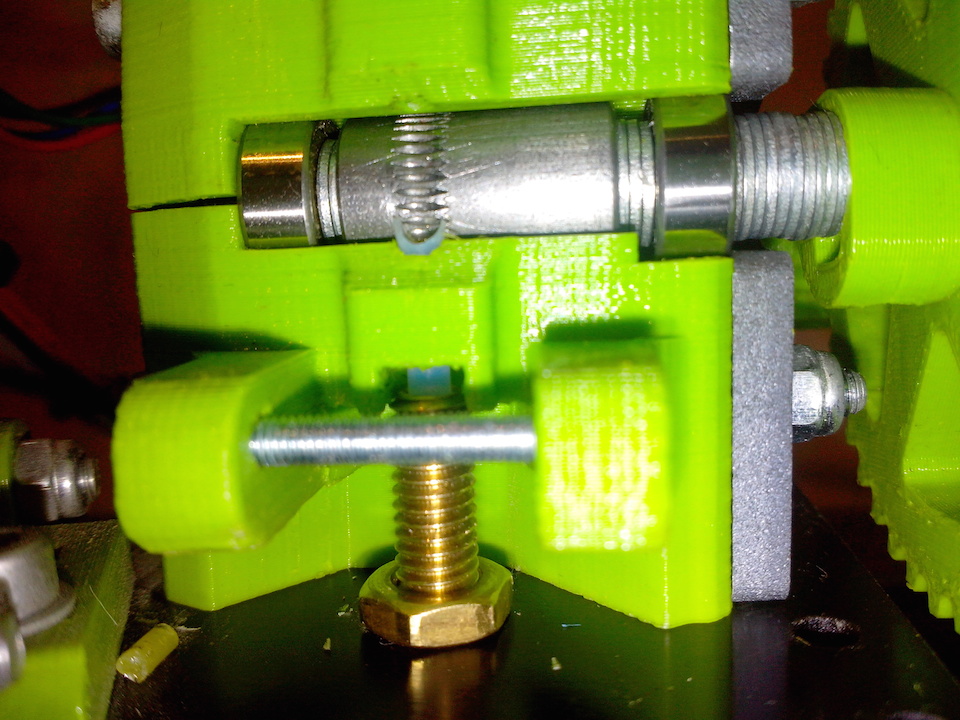
This gap needs to be closed up so the filament is constrained all the way into the hot end and cannot collapse sideways. You can see an example of this in the image above.
There are several ways to achieve this and your individual extruder may vary and it may/may not be possible to achieve on some printers.
- Retrofit an extra support insert into the extruder.
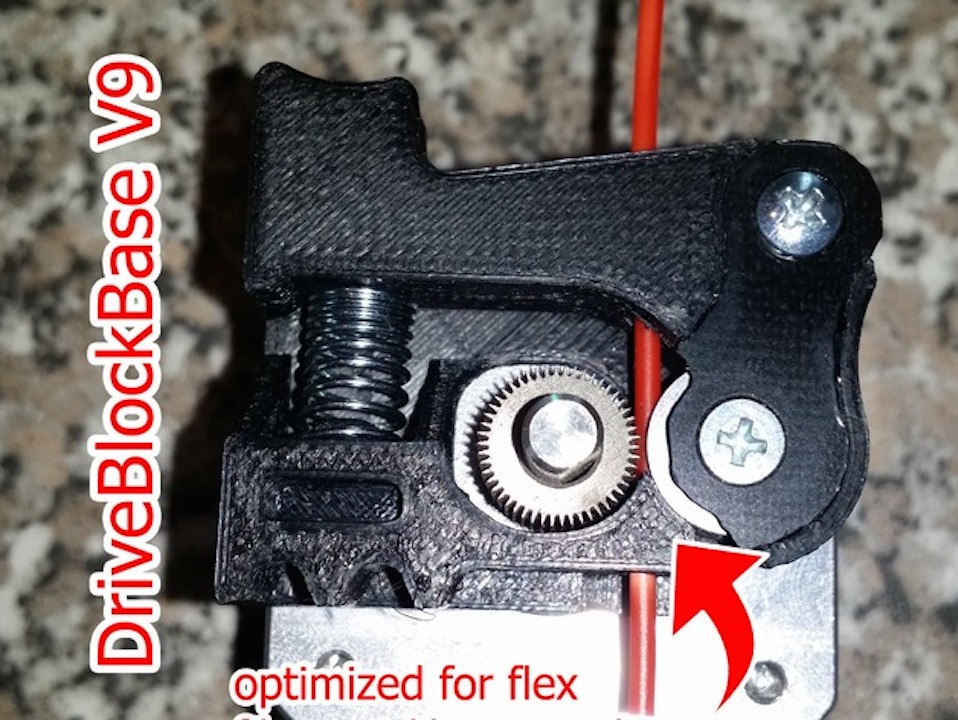
- An example of retrofit supports :
- Reprint yourself a new extruder design with built in filament support.
- There are many of these upgrades including several I have designed myself as part of “Gyrobot’s Extruder Week”:
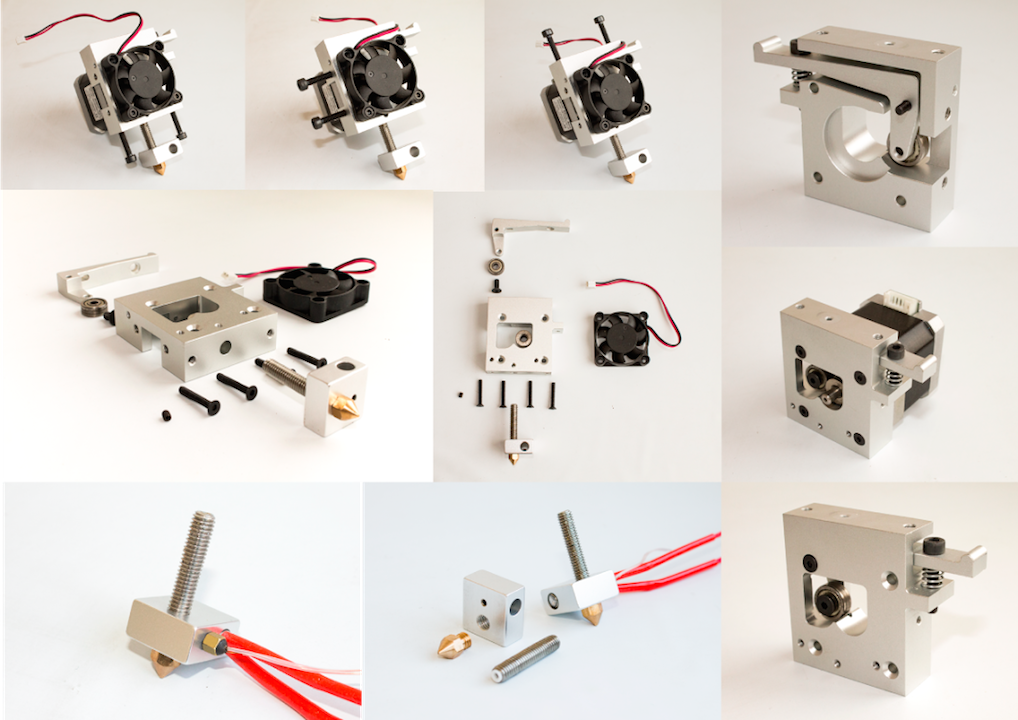
- Purchase an off the shelf extruder and hot end which is flexible filament compatible, such as the Recreus Extruder which has achieved flexible printing speeds of 120mm/s (Due Nov 2014):

Problem #2 – Friction
Excessive filament friction is the enemy for flexible printing, it can cause more pressure on the drive gear consequently more filament feed problems can happen as a result. Both excessive friction before and after the drive gear can result in issues.
Solution #2
Before the Drive Gear
If possible, feed the flexible filament directly into the Extruder, without a using a feed tube. Ideally from above at a height of 12” or more from the printer, the higher the better. This will provide an unrestricted path, with gravity on your side. If you have to use a feed tube, make sure it is PTFE (low friction) rather than Silicon, fuel line or pneumatic pipe etc. Avoid any sharp turns or kinks in the tube, and allow the filament to enter the tube as straight as possible. It is unfortunate that that latest generation of some popular printers have the most convoluted path you could probably imagine.
After the Drive gear
- Keep this length as short as possible to the hot end. Pushing a flexible filament into a hot end will result in compression and it’s diameter will increase as a result. Couple this with the thermal expansion of the filament inside the hot end and the pressure increases, miss feeds are the result. A Bowden style extruder are most problematic for this reason. I would suggest mounting the drive extruder above the printer rather than off to the side or rear, gravity will help in this case. Also for Bowden, as above, use a PTFE feed tube, and is also best with a 3mm diameter filament for fasted printing speeds, 1.75mm will work, again much slower though.
- Insert a PTFE liner into the hot end barrel:Thermal Expansion Problem :
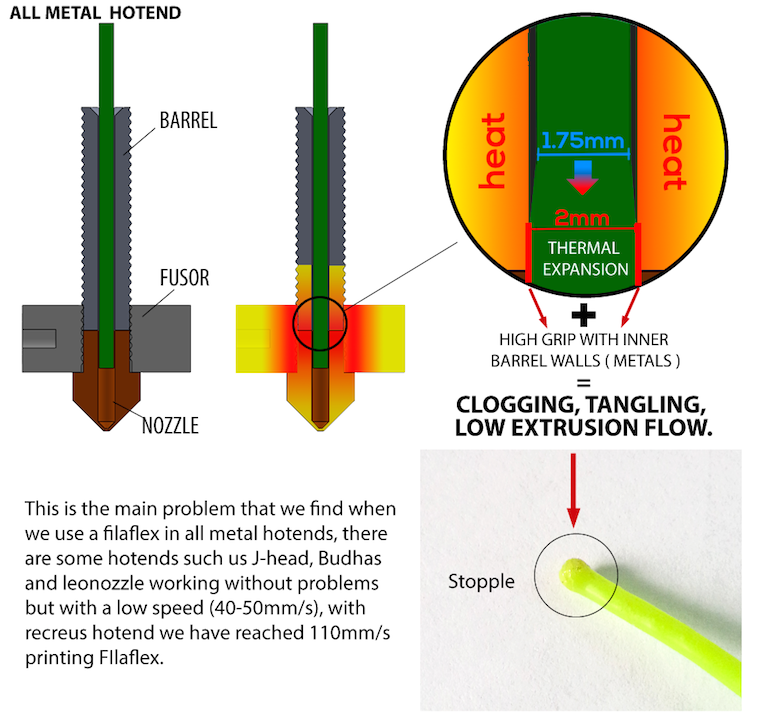
Thermal Expansion Solution :
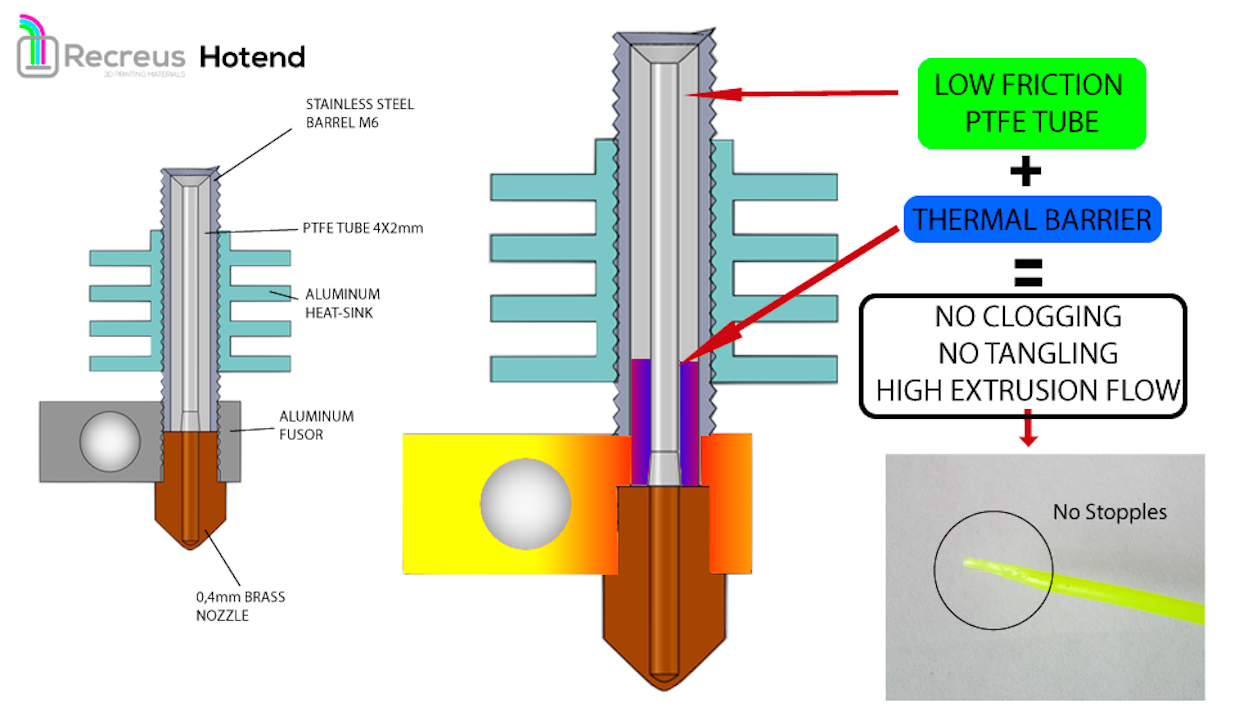
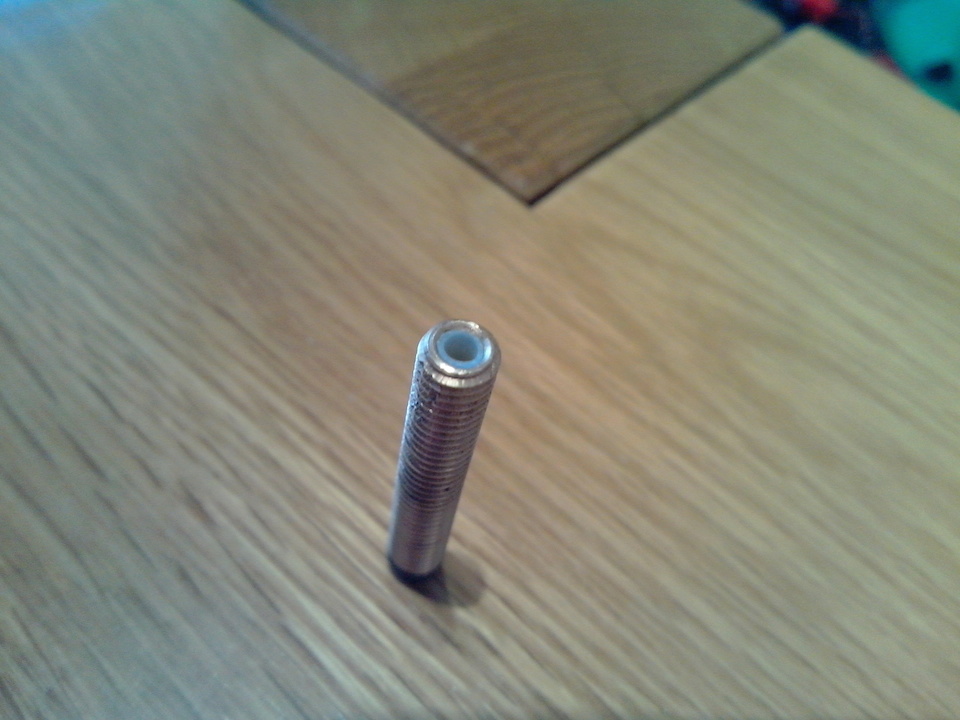
The PTFE liner, reduces friction and acts a thermal break to insulate the filament until it enters the hot-end so the diameter doesn’t expand too early:
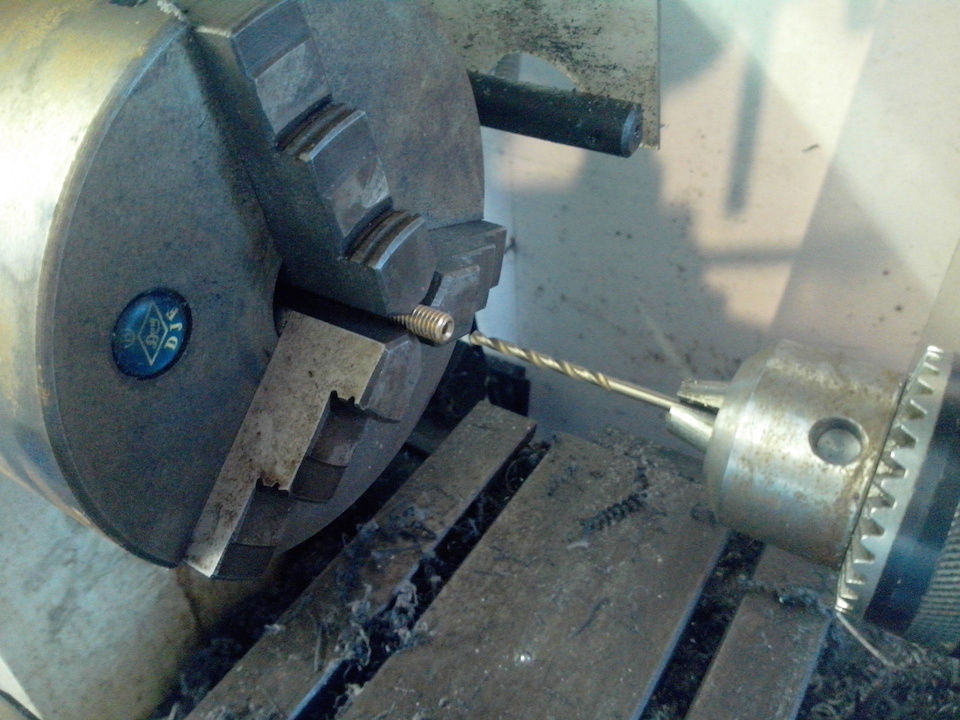
Drilling out a hot-end barrel, lathe not necessary, a standard hand drill can be used instead:
In the following photos, you can even see that the PTFE liner extends all the way up to the drive gear. This is the solution for an Orca 0.43 and my make of JackT’s ORCA 0.43 Extruderderivate on Thingiverse.

WARNING : The maximum printing temperature for PTFE lined hot-end is about 265deg C.
Problem #3 – Hotend Pressure
The last issue that we will address is a resulting property of fixing the previous two issues. If we have now have constrained filament and reduced the friction, we can now theoretically feed filament into the hot end at a much faster feed-rate. However if the nozzle hole size is small then the pressure in the hot end increases and we may not be able to achieve optimum speeds.
Solution #3
I have tried nozzles 0.2mm, 0.3mm, 0.4mm and 1mm and the 1mm nozzle certainly throws out the filament as you would expect, and you can ramp the speed up. A 1mm nozzle can actually still print pretty good quality prints, because the Z layer height can still be set low, say 0.3mm. The extrudate will be squashed flatter and you will loose detail on some complicated perimeters, but the Z resolution will still be good. A 0.4mm nozzle is a good compromise for XY quality and speed, but you may want to experiment. Richrap’s Quick-Fit Extruder carriage is excellent for quickly swapping out extruders for experimentation on Reprap style printers. I have also produced some Quick-Fit compatible single and dual extruders in my range.
Final Word
Slicing
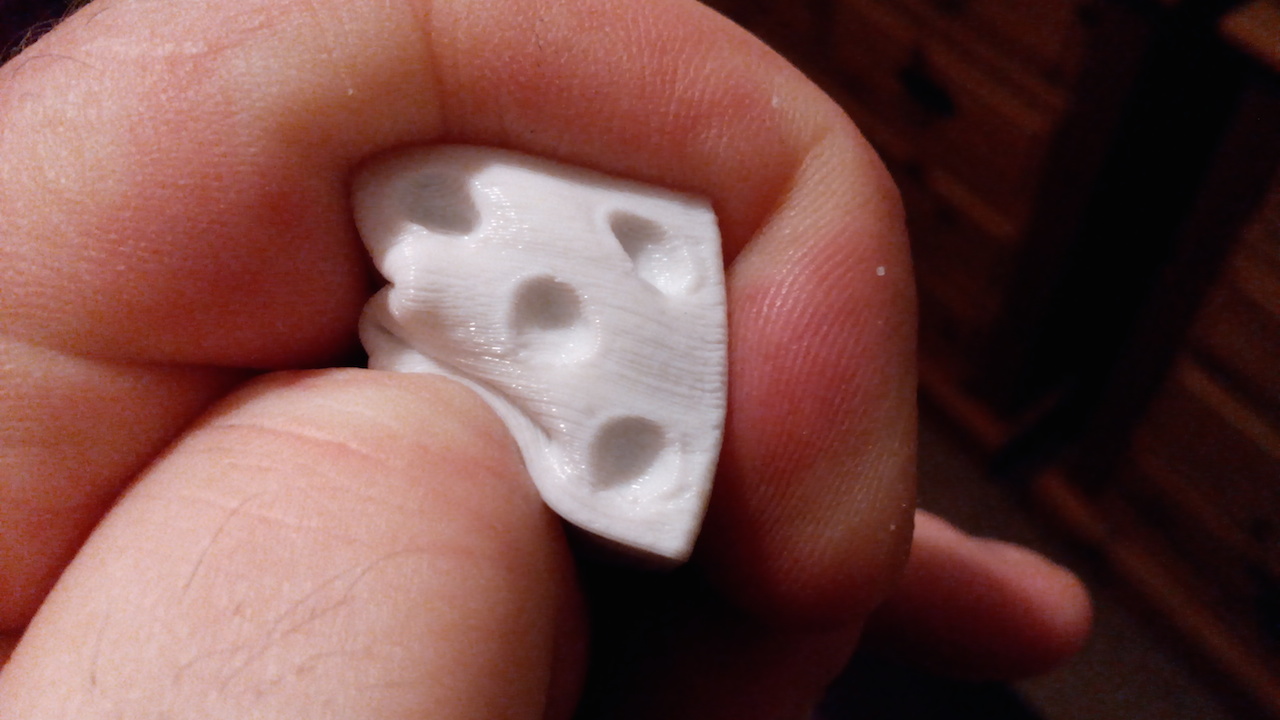
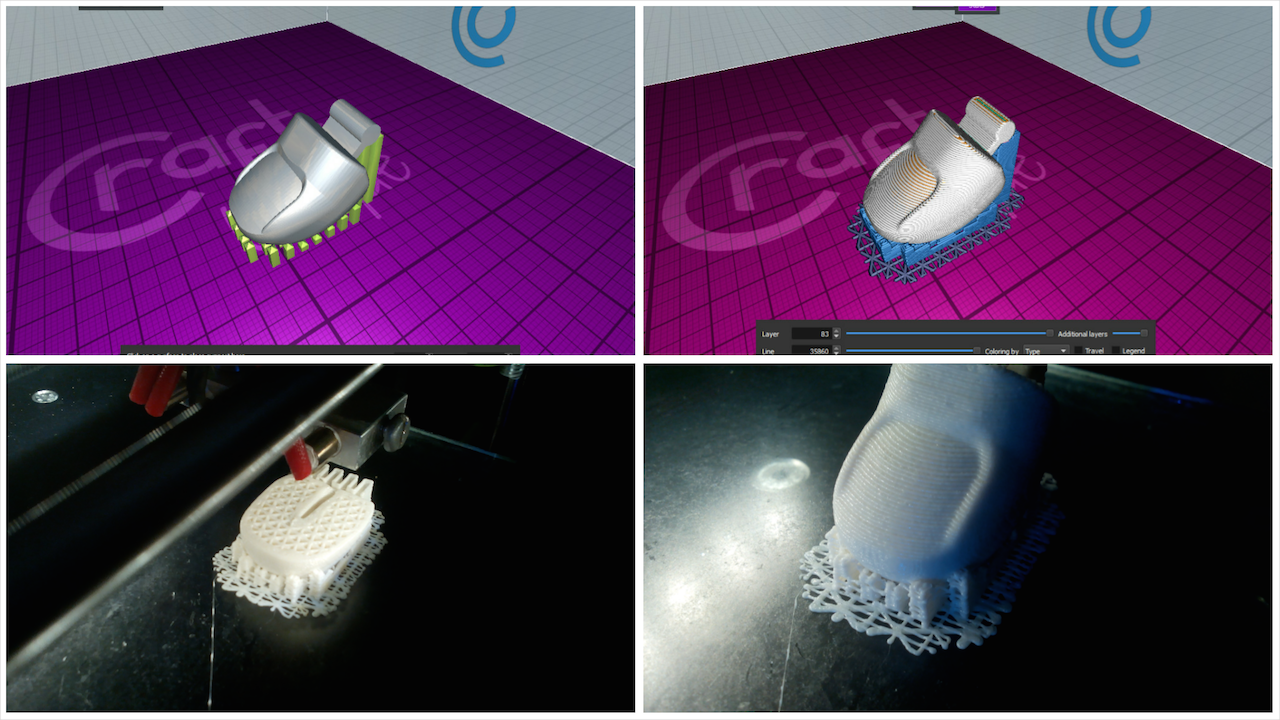
For me, my slicer of choice is Craftware by Craftunique. It seems to print flexible filament with the default settings, I just had to set the nozzle size (strangely called extrusion width) to my default 0.4 and reduce the speed accordingly, I also set the retract length to 4mm. It also has a great customisable support facility, which consists of pillars which can be added/removed/resized/auto generated before slicing, even placed on angles branching out like a tree. The support is easily removable, even with flexible filaments such as this Filaflex thumb below. It has super fast slicing, great graphics and is free, check it out :
However, here are some good starting profiles using Filaflex for Cura or Slic3r.
If you are building your own printer or manufacturing printers, then consider the Recreus Extruder and Hotend combo which is due out at beginning of November 2014, It’s a plug and play approach with many mounting holes on all sides so it is very adaptable. You will then be able to print with PLA, Filaflex and ABS at high speeds.
I would like to take this opportunity to thank Recreus for the use of some images to help me explain the problems and solutions.
There are also many solutions on Thingiverse for you to print off your own upgrade. Maybe it’s just a case of tweaking your hot end or slicer settings.
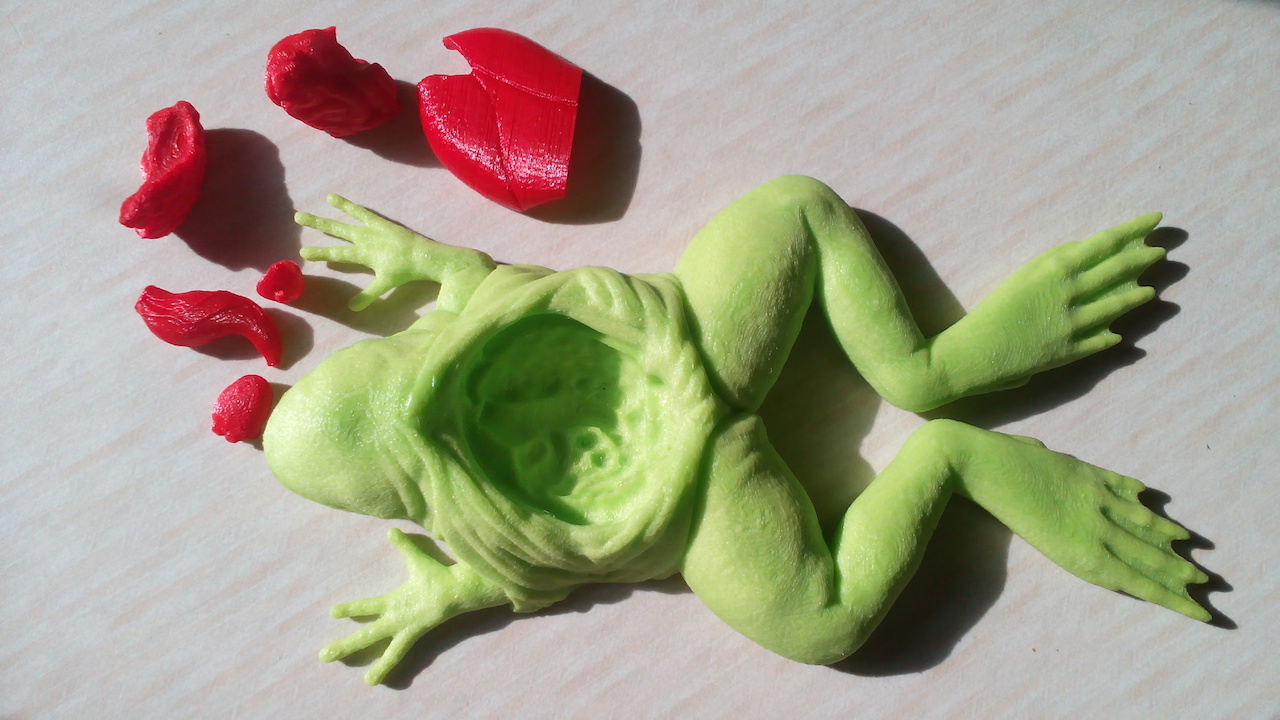
I will leave you with a gallery of my prints which are either printed fully in Filaflex or incorporate Filaflex within their design.
If you would like to stay up to date with my designs then please follow me on Thingiverse, Twitter, Facebook or Instagram.